CGKB News and events Other crops
Regeneration guidelines for cowpea
|
View regeneration guidelines in full (in PDF) Also available in the following languages: |
The information on this page was extracted from:
Dumet D., Adeleke R. and Faloye B. 2008. Regeneration guidelines: cowpea. In: Dulloo M.E., Thormann I., Jorge M.A. and Hanson J., editors. Crop specific regeneration guidelines [CD-ROM]. CGIAR System-wide Genetic Resource Programme, Rome, Italy. 8 pp.
Before reading the regeneration details for this crop, read the general introduction that gives general guidelines to follow by clicking here.
Introduction
Cowpea (Vigna unguiculata (L.) Walp.) is cultivated around the world primarily as a pulse but also as a vegetable (for its leaves as well as the green peas), as a cover crop and for fodder. It has many common names including blackeyed pea, crowder pea, southern pea, lubia, niebe, coupe and frijole. It belongs to the family Fabaceae and its cultivated species V. unguiculata (syn. V. sinensis (L.) Savi ex Hassk., V. sesquipedalis (L.) Fruwirth) include 11 sub species and a large number of related species, many of them grown as minor legumes or forage crops. Amongst these are V. subterranea (L.) Verdc., V. radiata (L.) R. Wilczek, V. angularis (Willd.) Ohwi & H. Ohashi and V. umbellata (Thunb.) Ohwi & H. Ohashi.
Cowpea is an annual herbaceous plant with a large tap root and alternate trifoliate leaves with ovate leaflets. It shows considerable diversity in growth habit, flower and seed coat colour. The standard flowers vary in colour from white, cream and yellow to purple and the seeds, which are smooth or wrinkled, range from white, cream or yellow to red, brown or black and are characterized by a marked hilum surrounded by a dark aril.
Cowpea is regenerated by seeds and is largely self pollinating but up to 2% outcrossing has been reported (Ng and Hughes 1998; Fatokun and Ng 2007).
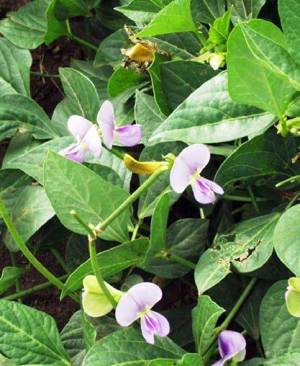
Cowpea at flowering. (photo: Jean Hanson/ILRI) |
Choice of environment and planting season
Climatic conditions
- The environment most similar to that of the collection site is generally considered optimum. Cultivated cowpea varieties are adapted to hot and dry conditions. They grow best at low altitudes with a precipitation of about 1000–1200 mm and temperatures between 22° and 30°C over 6 months.
- Cowpea does not tolerate excessively wet conditions, cold or frost.
Planting season
- Plant during rainy seasons or in dry seasons with irrigation.
Preparation for regeneration
When to regenerate
- When insufficient seeds or plant propagules are available for conservation or distribution.
- After viability loss in storage, when percentage germination drops below 75%.
Pre-treatments
- Cowpea, like all legumes, forms a symbiotic relationship with a specific soil bacterium (Rhizobium spp.). Although cowpea Rhizobium is normally widespread, innoculating seed with Rhizobium specific to cowpea would be beneficial in areas where it is not present (Davis et al. 1992).
- Pre-treat seeds with a fungicide (e.g. Mencozeb coating) before planting.
Field selection and preparation
- Cowpea grows best on a sandy loam with a pH close to neutral, with good drainage on flat land and gentle slopes. It also tolerates acid and alkaline soils.
- Plough, harrow and ridge soil before sowing.
Method of regeneration
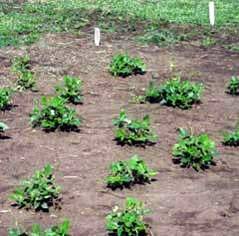
Spacing at planting. (photo: Jean Hanson/ILRI) |
Planting
Planting layout, density and distance (see photo)
- Sow 80 seeds (a minimum of 50 seeds) per accession in two 4-m rows (40 seeds per row), with 75 cm between rows.
- Sow two seeds per hole, 2–3 cm deep and make holes 20 cm apart.
- Plant two border lines of cowpea as a growth control.
- Using the above layout, you can maintain an average 1333 accessions per ha.
Sowing method
- The normal sowing method is direct planting.
- Alternatively, for accessions with very few seeds or poor germination, germinate seeds in an incubator and sow in pots in a screenhouse/greenhouse; move to the field as small plants (at least 5–6 nodes on the main stem).
Isolation method
- Place pol ination cages (see photo) at flower bud initiation stage during ful regeneration.
- Keep 50 accessions per cage.
- Use netting with 3 mm mesh or smaller.
- Alternatively, use spatial isolation with a distance of at least 20 m, and preferably 50 m, between accessions.
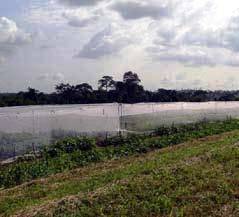
Pollination cages for geneflow control. (photo: IITA genebank) |
Labelling
- Label each row with a weather-resistant tag fastened to a stake about 1m high.
Crop management
Weed management
- Weeding frequency will depend on rate of growth of the weeds and their density. On average, weeding two or three times may be required during the growing season.
Irrigation
- Irrigation is required in the dry season, 2 to 4 hours twice a week with a sprinkler.
Fertilization
- As a legume, cowpea fixes its own nitrogen and thus does not need nitrogen fertilizer.
- Apply phosphate fertilizer: single super phosphate (SSP) at 60 kg/ha or triple super phosphate (TSP) at 25 kg/ha.
Common pests and diseases
Contact plant health experts to identify the symptoms of the likely pests and diseases and the appropriate control measures. The following eight insect-transmitted viruses are reported to be seed-borne in cowpea (Ng and Hughes 1998):
- Cowpea yellow mosaic comovirus, CYMV (beetle)
- Cowpea aphid-borne mosaic potyvirus, CABMV (aphid)
- Blackeye cowpea mosaic potyvirus, BlCMV (aphid)
- Cowpea mottle (carmo) virus, CPMoV (beetle)
- Cucumber mosaic cucumovirus, CMV (aphid)
- Southern bean mosaic sobemovirus, SBMV (beetle)
- Cowpea mild mottle carlavirus, CPMMV (whitefly)
- Sunn-hemp mosaic tobamovirus, SHMV
Major pests attacking cowpea are flower thrips (Megalurothrips sjostedti), legume pod borer (Maruca vitrata) and a number of pod sucking insects.
Pest and disease control
- It is good practice to carry out regeneration in insect-proof conditions, but this may be impractical under the scale of regeneration required.
- Follow recommendations provided by your plant health expert to prevent and control pests and diseases during regeneration.
Other
- Plants showing disease symptoms, or different flower colour or shape compared with the overall population, should be eliminated.
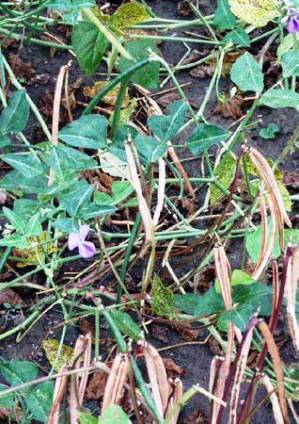
Mature pods, ready for harvesting. (photo: Jean Hanson/ILRI) |
Harvesting
- Harvest seeds from all plants to ensure retention of genetic integrity of the original accession (Ng and Hughes 1998).
- As a general principle, take an equal number of seeds from the largest possible number of maternal plants in order to keep the effective population size (Ne) as high as possible (Vencovsky and Crossa 1999).
- Harvest pods when 95% in one accession have turned yellowish brown (see photo).
- The approximate time of harvest in the field is 60 to 120 days after planting but it depends on the maturity of the plants.
- Harvest pods by hand when they are dry and keep them in net bags.
Post-harvest management
Seed processing
- Pre-dry pods under shade (in a glasshouse if possible).
- Thresh pods either by hand or using a threshing machine.
- Clean seeds with a blower or by hand (depending on seed quantity).
- Fumigate seeds to reduce pests and diseases only if there are signs of insect attacks.
- Note that this is, however, not generally recommended for long-term storage.
- Perform a final hand cleaning and conformity check (with original seed sample) to eliminate obvious alien seeds.
- Dry seeds in a drying room (RH=10–15%, temperature=16–18°C) for 4 to 10 weeks, i.e. until optimal water content is reached (7–8% for cowpea). If a drying room is not available, dry seeds to a moisture content of 7–8% with silica gel or another appropriate desiccant.
- Germinate seeds on germination paper in a polyethylene box at 20–30°C (20 seeds per accession).
- Determine seed moisture content (gravimetric) by fresh and dry weight after dehydration in oven at 80–110°C for 24 hours, 20 seeds per accession and/or with a seed moisture reader.
- Store seeds in plastic boxes at 5–8°C for medium-term storage and under vacuum in laminated aluminium foil for long-term storage (-20°C).
Monitoring accession identity
Keep an original seed sample in a small plastic bag in a dry environment at 15°C. Whenever the accession is regenerated, you can match the newly harvested seed to the seed sample. Confirm the regenerated seed accessions by comparing them with the following traits in the original characterization data:
- Flower characteristics
- Days to flowering
- Plant type (erect/semi erect/spreading/climbing)
- Days to maturity
- Pod colour
Documentation of information during regeneration
The following information should be collected during regeneration:
- Accession number
- Regeneration site name and map/GPS reference
- Field layout used; field/plot/nursery/glasshouse reference
- Environmental conditions, e.g. altitude, precipitation, soil type (only if not using usual regeneration site)
- Sowing date
- Number of seeds sown
- Field management details (watering, fertilizer, weeding, pest and disease control, stresses recorded, other)
- Emergence in the field or green house (number of plants germinated)
- Number of plants established
- Days from sowing to flowering
- Days to maturity (when 95% mature on same accession)
- Pollination control (method, number of plants pollinated)
- Date of first harvest and method
- Date of final harvest
- Number of plants harvested
- Quantity of seeds harvested
- Agronomic evaluation; agro-morphological traits recorded (if needed)
- Comparisons with reference materials (record any identification numbers or references of any samples taken from the regeneration plot)
- Post harvest (describe any relevant procedures)
References and further reading
Bioversity International, NBPGR, IITA. 2010. Key access and utilization descriptors for cowpea genetic resources. Bioversity International, Rome, Italy; National Bureau of Plant Genetic Resources, India; International Institute of Tropical Agriculture, Nigeria. Available here.
Davis DW, Oelke EA, Oplinger ES, Doll JD, Hanson CV, Putnam DH. 1992. Cowpea. Alternative field crop manual. University of Wisconsin, University of Minnesota. Available from: http://www.hort.purdue.edu/newcrop/afcm/cowpea.html. Date accessed: 12 March 2008.
Fatokun CA, Ng Q. 2007. Outcrossing in cowpea. Journal of Food, Agriculture and Environment 5:334–338.
Ng NQ, Hughes Jd’A. 1998. Theoretical and practical considerations in the regeneration of cowpea germplasm at IITA. In: Engels JMM and Ramanatha RR, editors. Regeneration of seed crops and their wild relatives. Proceedings of a consultation meeting, 4–7 December 1995, ICRISAT, Hyderabad, India. IPGRI, Rome, Italy. pp 76–80. Available here.
Vencovsky R, Crossa J. 1999. Variance effective population size under mixed self and random mating with applications to genetic conservation of species. Crop Science 39:1282–1294.
Acknowledgement
These guidelines have been peer reviewed by Jean Hanson, International Livestock Research Institute (ILRI), Ethiopia, and Remy Pasquet, International Centre of Insect Physiology and Ecology (ICIPE/IRD), Kenya.
Regeneration guidelines for faba bean
|
View regeneration guidelines in full (in PDF)
Also available in the following languages: |
The information on this page was extracted from:
Street K., Ismail A. and Rukhkyan N. 2008. Regeneration guidelines: faba bean. In: Dulloo M.E., Thormann I., Jorge M.A. and Hanson J., editors. Crop specific regeneration guidelines [CD-ROM]. CGIAR System-wide Genetic Resource Programme, Rome, Italy. 9 pp.
Before reading the regeneration details for this crop, read the general introduction that gives general guidelines to follow by clicking here.
Introduction
Faba bean (Vicia faba L.) belongs to the Fabaceae family and has many common names. It is native to northern Africa and south-west Asia, where it is extensively cultivated. The species spread from the Mediterranean region to Europe and then through Eurasia and to parts of the New World. Extensive cultivation occurs in all these regions, particularly in China. Although classified in the same genus as the vetches (Vicia), some botanists argue that the species should be treated as a separate monotypic genus; Faba sativa Moench or Faba bona Medik. No wild progenitor of faba bean has been identified and the species does not produce fertile hybrids with any other Vicia species.
Faba bean is a diploid species, 2n=12 (six homologous pairs) and partly out-crossing; cross-pollination is reported to range from 8% to 84%, with an average of 35% (Bond and Poulsen 1983). The plant is rigid and erect, growing to 0.5 to 1.7 m tall. The leaves are 10–25 cm long, pinnate with two to seven leaflets and have a distinct grey-green colour. Faba bean differs from most other vetches in that the leaves do not have tendrils for climbing. The pods are green, broad and leathery. When mature they are blackish-brown with a dense, downy surface. Three distinct types, based on seed size, are commonly recognized: the large-seeded variety major; the intermediate variety equina and the small-seeded variety minor.
Given the high degree of allogamy (cross-fertilization) within Vicia faba germplasm, it is important to optimize the regeneration procedure. Freshly harvested seed must be processed rapidly and efficiently to maintain seed quality so that the periods between regeneration are as long as possible. This guideline applies to genebank accessions of faba bean, including commercial varieties, breeding material, pure lines and landrace populations.
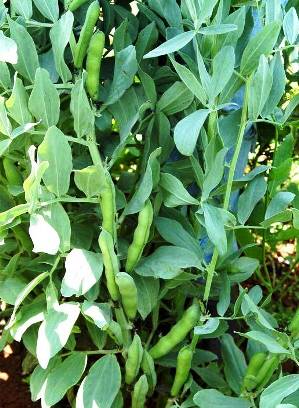 A faba bean plant. (photo: ICARDA) |
Choice of environment and planting season
Planting season
- Plant during the rainy season in Mediterranean-type environments (winter planting). Sow after the first substantial rainfall event of the season and when there is a high likelihood of subsequent rainfall.
- Sow in spring in northern Europe and America, simultaneously with spring cereals, i.e. the end of April to the beginning of May.
- Where the rainy season coincides with warm, humid weather, plant during the post-rainy season as temperatures and humidity decline. In India, this is during October. This wil reduce pressure from diseases and pests. The short days of the post-rainy season also induce flowering in photosensitive germplasm, thus enabling seed production.
Preparation for regeneration
Use screenhouses to prevent insect-facilitated cross-pollination
- To maintain the genetic integrity of accessions, take special care to prevent out-crossing between accessions but facilitate crossing between individuals within accessions to avoid inbreeding depression.
- Ideally, plant the accessions in isolation fields outdoors and separate them from each other by at least 500 m; this allows natural pollinators to pollinate within accessions but not between them.
-
Alternatively, use isolation cages or screenhouses to limit the movement of pollinators between accessions (see photo). Ideally, screenhouse structures should be collapsible so they can be moved from one part of the field to another from season to season. They should be tall enough to allow for easy plot maintenance and large enough to allow multiple plots to be planted. The screen should be made of a robust, UV-resistant material with a mesh size small enough to prevent bees and other insects access to the plants whilst also letting in adequate light. The screen should also be porous enough to allow wind to pass through the structure, as the movement of plants in the wind leads to more self-pollination. The screenhouses used at ICARDA are 32 m long, 32 m wide and 2.5 m high.
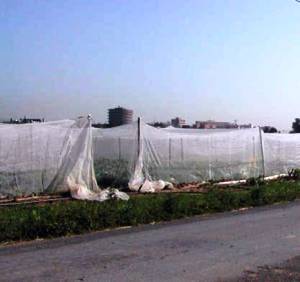
Isolation cages without pollinators at IFAPA (Instituto Andaluz de Investigación y Formación Agraria, Pesquera, Alimentaria y de la Producción Ecológica), Centro Alameda del Obispo, Córdoba, Spain. (photo: Salvador Nadal)
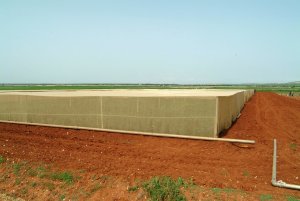
Isolation cages of Faba bean. (photo: ICARDA)
- Erect screenhouses over plots after planting but before the onset of flowering. Inspect the mesh for damage and repair holes immediately.
- Pile soil onto the mesh screening where it meets the ground to ensure there are no gaps at the base of the structure.
- To avoid inbreeding depression and subsequent genetic erosion, cross-pollinate between individuals within accessions artificially using standard hand cross-pollination techniques regularly used by breeders. If you are not familiar with these techniques, seek a demonstration by a trained technician or breeder.
- Alternatively, instead of using one large exclusion cage, erect separate mini-exclusion cages over each accession and introduce pollinators into each cage.
- There are pros and cons associated with each method so you will need to consider what is practical to do with the resources at hand.
When to regenerate
- For genetically diverse populations, when seed stocks in the active collection fall below 400 seeds.
- For genetically fixed material, such as breeding lines, regenerate when stocks fall below 250 seeds.
- When germination of seeds in either the active or long-term collections drops below 75%. ICARDA observes a standard of 90%.
Preparing seed for planting
- Treat seeds with appropriate fungicide and insecticide.
- Label seed packets with the accession identity number and intended plot number.
Field selection and soil preparation
- Fusarium wilt and chocolate spot are the major limitations to crop growth during regeneration of faba bean. They can be controlled through solarization of soil and field rotation, e.g. cereals–legumes–fallow.
- Sow into well-drained, weed-free soil to ensure a good reserve of soil moisture.
- Faba bean grows best on alkaline soil.
- Deep plough to invert the soil, followed by two or three harrowings to create a fine tilth and level planting bed.
- Make ridges spaced 45 cm apart and plant seeds into the furrow created between the ridges.
Method of regeneration
Planting layout, density and distance
- For accessions of landraces and variable populations, plant at least 150 seeds in six rows (25 seeds per row). Use rows of 3 m long to maintain the diversity in the accession.
- For pure-line material that is genetically fixed (genetically uniform), 20–30 plants should yield adequate amounts of seed to top up seed stocks.
- Separate plots from each other by at least 90 cm.
Sowing method
- Sowing is best done by hand. Dibble one seed every 12 cm into a 5-cm-deep furrow created between the ridges, which are 45 cm apart. This allows adequate space for mechanical cultivation to control weeds when the plants are small and also allows for flood irrigation later in the season when the cages are constructed over the plots.
- Close the furrow when the seeds are placed.
Plot labelling
- Label each plot with the plot number and the accession’s unique identifying number (for example the IG number is used at ICARDA) written onto a plastic tag fastened to a stake about knee high. Use plastic labels and markers that can withstand weathering. Use labels with duplicate information that is harvested with the plants/seed and stays with the sample at all times, to reduce the risk of misidentification.
Crop management
Weed management
- Immediately after planting apply a pre-emergence herbicide mixture that targets both cereal and broadleaf weeds. For example, a mixture of propyzamide and terbutryn is used at ICARDA.
- Cultivate between rows twice during early stages of plant growth using a mechanical cultivator.
- Weed by hand at later stages if required.
- Eliminate off-types and plants growing outside the row by hand.
Fertilization
- Apply a basal dose of diammonium phosphate at 100 kg/ha.
Irrigation
- Irrigate the field immediately after sowing. Apply supplementary irrigation when necessary to ensure adequate seed yield. Plants should not become so water-stressed that flower or pod abortion occurs or pod-filling is impeded.
Common pests and diseases
Contact plant health experts to identify the symptoms of the likely pests and diseases and the appropriate control measures. Common pests and diseases include:
Pests
- Field pests: aphids, leafminer, Sitona weevil, Spodoptera spp., stem borers, thrips.
- Store pests: Bruchus spp., Callosobruchus spp.
Diseases
- Ascochyta blight (Ascochyta fabae)
- Root rot/wilt (Fusarium spp., Rhizoctonia spp., Scelerotinia spp., Helminthosporium spp.,etc.)
- Rust (Uromyces fabae)
- Powdery mildew (Erysiphe polygoni, Leveilulla taurica)
- Downy mildew (Peronospora sp.)
- Chocolate spot (Botrytis fabae, B. cinerea)
- Leaf spot (Alternaria spp., Cercospora spp.)
- Bean leaf roll virus (BLRV) and similar luteoviruses
- Bean yellow mosaic virus (BYMV)
- Broad bean stain virus (BBSV)
- Broad bean witch’s broom virus (BBWBV)
Nematodes
- Stem nematode
- Root lesion nematodes
Parasites
- Orobanche spp.
- Cuscuta spp.
Pest and disease control
- Coordinate periodic field inspections with pathologists and virologists during the growing season.
- Spray with appropriate chemicals when necessary.
Pollination and pollinator behaviour
- Adequate pollinators are solitary bees, honey bees, Sylocopa.
- Coordinate periodic field inspections with an entomologist during the growing season to identify pollinators and evaluate the accessions for phenological and floral morphological traits.
- Identify the most efficient pollinators.
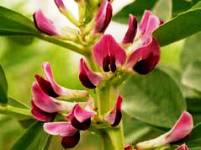
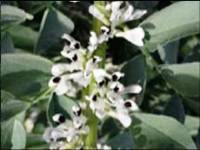
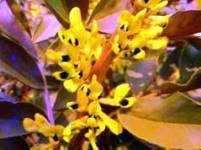
- Determine relationship of the pollinator with flower morphology (see photos below).
 |
 |
 |
|
Examples of different flower morphologies of faba bean. (photos: J.L.Ubera) |
||
Harvesting
Harvest when pods become dark and dry. Dryness can be judged by the rattling sound pods make when shaken. Harvest by hand.
1. Hold the stem at the base and pul the plant from the soil.
2. Tie the uprooted plants from a row into small bundles and label them with accession number and field plot number.
3. Thresh the pods from individual plants on a tarpaulin by gently beating with sticks and collect the seeds into paper packets.
4. Take care to avoid spill over and seed mixing during threshing.
Desiccation of the plants can improve harvestability. A desiccant can be applied some days before and up to harvest.
Post-harvest management
1. Manually clean large-seeded accessions of any contaminating debris in a way that causes least damage to the sample.
2. For small-seeded accessions whose seeds wil pass through the sieves of a seed-cleaning machine, clean mechanical y, fol owed by a second hand cleaning to eliminate any further debris that passed through the mechanical process.
3. If using a machine, clean it meticulously after each accession.
4. If signs of insect attack are detected, it may be wise to fumigate the harvested seeds with an appropriate insecticide. However, this is not generally recommended, especially for long-term storage.
5. Determine total weight of cleaned seeds.
6. Determine 100-seed weight.
7. Dry accessions by placing seed in a low humidity, standard room temperature environment that is kept constant for up to 3 weeks. If using a control ed seed drying room, drying at 15°C and 15–20% RH is recommended. If a drying room is not available, dry seeds to a moisture content of less than 3–7% with silica gel or other appropriate desiccant.
8. Determine moisture content—it should be 3–7% for storage.
9. Send a subsample of each accession for viability testing.
10. Process the material for storage.
Monitoring accession identity
Maintaining the correct identity of accessions
When processing seed for planting, during planting, in the field, during harvest and post-
harvest, make sure that the seeds of a given accession remain with the correct identity
number. Always label packets of seeds, plots and harvested material with the appropriate
ID number in such a way that there is no chance of mixing up or losing the identity of the
accession.
Maintaining population integrity
When conserving accessions of genetically diverse populations, it is important to maintain
adequate seed numbers to maximize the diversity of the sample, i.e. a minimum of 4000
seeds. When regenerating such accessions, it is equally important to plant an adequate
number of seeds to capture the original variation in the population and ensure that genetic
drift does not occur within the population (see introductory chapter).
For active collections where seed reserves could be run down rapidly due to requests it is
advisable to plant enough seed to produce a large amount of seed (1–2 kg) to minimize the
number of regeneration events and hence to avoid genetic drift.
Comparisons with previous passport or morphological data
Compare each accession with the following characterization data previously recorded for
the accession:
- Growth habit
- Flower colour
- Seed colour
- Seed shape
If the identity of the accession is in doubt, check it against its herbarium voucher specimen.
Discard the accession if its identity is not the same as the original accession.
Documentation during regeneration
Collect the following information during regeneration and record it in the genebank
information system:
- Regeneration site name and map/GPS reference
- Name of scientist involved in regeneration
- Field/plot/nursery/greenhouse reference
- Accession number; population identification
- Source of seed
- Previous multiplication or regeneration references
- Preparation of planting materials (pre-treatments)
- Sowing date and density
- Field layout used
- Field management details (watering, fertilizer, weeding, pest and disease control, stresses recorded, others)
- Environmental conditions (altitude, precipitation, soil type, others)
- Emergence in the field or greenhouse (number of plants germinated)
- Number of plants established
- Days from sowing to flowering
- Harvest date and method
- Number of plants harvested
- Quantity of seeds (approximate weight)
- Agronomic evaluation; agro-morphological traits recorded
- Taxonomic identification
- Post-harvest (uniformity of maturity, lodging susceptibility)
References and further reading
Bioversity International, ICARDA. 2009. Key access and utilization descriptors for faba bean genetic resources. Bioversity International, Rome, Italy; International Center for Agricultural Research in the Dry Areas, Syria. Available here.
Bond DA, Poulsen MH. 1983. Pollination. In: Hebblethwaite PD, editor. The Faba Bean (Vicia faba L.). Butterworth, London, UK. pp. 157–179.
Muratova VS. 1931. Common beans (Vicia faba L.). Bulletin of Applied Botany of Genetics and Plant Breeding. 50th supplement. pp. 248–285.
Acknowledgements
These guidelines have been peer reviewed by María José Suso, Instituto de Agricultura Sostenible (CSIC), Spain, Margarita Vishnyakova, N.I. Vavilov Research Institute of Plant Industry (VIR), Russia, and Mike Ambrose, John Innes Centre (JIC), UK.
Regeneration guidelines for finger millet
|
View regeneration guidelines in full (in PDF)
Also available in the following languages: |
The information on this page was extracted from:
Upadhyaya H.D., Gopal Reddy V. and Sastry D.V.S.S.R. 2008. Regeneration guidelines: finger millet. In: Dulloo M.E., Thormann I., Jorge M.A. and Hanson J., editors. Crop specific regeneration guidelines [CD-ROM]. CGIAR System-wide Genetic Resource Programme, Rome, Italy. 7 pp.
Before reading the regeneration details for this crop, read the general introduction that gives general guidelines to follow by clicking here.
Introduction
Finger millet (Eleusine coracana (L.) Gaertn.) is an important subsistence cereal in parts of Africa and south Asia. The species has two subspecies, africana (Kenn.-O’Byrne) K.W. Hilu & de Wet and coracana (L.) Gaertn. Subspecies africana has two races, africana and spontanea, while subspecies coracana has four races: elongata, plana, compacta and vulgaris (Prasada Rao et al. 1993). Finger millet is mostly self-pollinating, with some amount of cross-pollination (1%) mediated by wind (Jansen and Ong 1996; Purseglove 1972). Finger millet is very adaptable to a wide range of environmental and climatic conditions, thrives at higher elevations than most other tropical cereals and tolerates salinity better than most cereals.
Choice of environment and planting season
Climatic conditions
- Finger millet grows best in an environment with medium rainfall, an annual temperature range of 11 to 27°C and a soil pH of 5.0 to 8.2 (Duke 1978, 1979). Areas with low precipitation and low relative humidity during seed ripening and maturation are best for regeneration.
Planting season
- Carry out regeneration in the rainy season as finger millet requires moist conditions for germination.
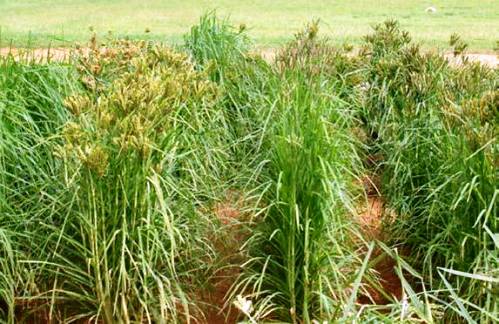
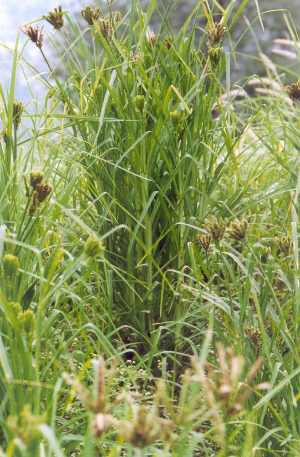
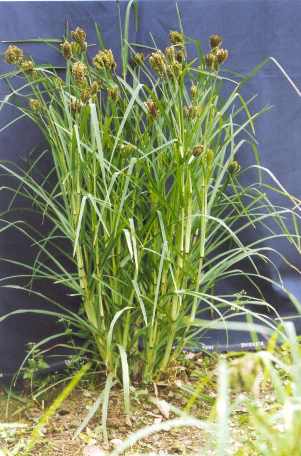
Finger millet (Eleusine coracana) field. (photo: ICRISAT)
Preparation for regeneration
When to regenerate
- When seed stocks are <50g.
- When germination drops below 75%.
- If the percentage of seeds infected by one or more of the following fungi is >25%: Alternaria, Aspergillus, Cladosporium, Curvularia, Fusarium, Macrophomina, Penicillium, Phoma and Rhizopus spp.
Seed sample
- To maintain genetic integrity use seed from the original source, if possible.
- A minimum of 40 plants is required for regeneration.
- At least 3 g seeds are required for regeneration of a germplasm accession.
- Finger millet seed is small; take care when preparing the seed samples.
- For each accession, prepare one seed packet for planting each row.
- Label packets with identification number and row number and arrange them according to field lay-out.
Field selection and preparation
- Choose a field which was not under millet during the previous two years to reduce risk of volunteer plants.
- Keep the field well drained throughout the growing period and free from weeds at sowing.
- Prepare a fine tilth by deep ploughing, followed by three or four harrowings as plants will not grow in soil which is not well compacted.
- Make ridges 75 cm apart on a levelled field.
Method of regeneration
Finger millet is a self-pollinated crop and seed regeneration does not require any pollination control. Leave a distance of 3 m between accessions.
Planting layout, density and distance
- Divide the field into plots (also known as tiers), leaving a 1-m walking space between them. Plots should be at least 4 m wide.
- Mark rows 75 cm apart across each tier, perpendicular to the length of the field, giving rows of at least 4 m long or more, depending on the width of the plot.
- Distribute seed packets according to field plan.
- Ensure a minimum of 3 m between accessions.
- Assign row numbers in serpentine pattern (i.e. planting from left to right in the first row followed by right to left in the second row or vice versa).
Planting method
- Sow seeds by hand at a depth of 2.5 cm in a furrow and close the furrow after sowing.
Labelling
- Label each accession with a tag fastened to a stake about knee height.
- The tags should be of strong paper to withstand weathering.
Crop management
Weed management
- Weed by hand 21 days after planting.
- Remove alien plants.
Thinning
- Thin plants when seedlings are 2–3 weeks old, leaving 10 cm spacing between the plants and a minimum of 40 plants per accession.
Fertilization
- Apply fertilizers on the basis of soil test results. In the absence of a soil test apply diammonium phosphate at 100 kg/ha as a basal dose before sowing and 100 kg urea/ha as top-dressing 21 days after sowing.
Irrigation
- Apply supplemental irrigation after sowing if the soil is not moist enough; irrigate again if leaves wilt at any stage of crop growth and to ensure enough moisture in soil at flowering.
Common pests and diseases
Contact plant health experts to identify pests and diseases and appropriate control measures. Some of the major pests and diseases of finger millet are:
- Blast (Pyricularia grisea)—produces lesions on leaves, peduncle and ear. Severe infection may result in death of seedling
- Leaf blight (Helminthosporium nodulosum)
- Shoot fly (Atherigona milliaceae)
- Pink stem borer (Sesamia inferens)
 |
 |
|
Finger millet (photos: National Bureau of Plant Genetic Resources, Regional Station, Phagli, Shimla, India) |
|
Harvesting
- Finger millet cultivars are known to vary in time to maturity but ear heads can be harvested about 40 days after flowering to facilitate easy threshing.
- Harvest manually by cutting ear heads below the base.
- Collect ear heads from each row in a clearly labelled muslin cloth bag and dry in the shade for about 1 week.
Post-harvest management
- Dry panicles in shade to about 12% seed moisture content — ideal for hand threshing.
- Clean the seeds of debris by winnowing.
- Bulk equal amounts of seed from each plant to make up the accession.
- Avoid spillover and contamination during threshing and subsequent handling.
- Send a representative sample for observations on seed traits, seed health and viability testing.
- Reject seed samples with a high percentage of infection and list for next regeneration.
- Do not apply chemical treatment to seed intended for storage.
- Collect seeds in a labelled muslin cloth bag for further drying, preferably at a lower temperature and relative humidity.
- Dry seeds to 8–9% moisture content for medium-term conservation. For long-term conservation, dry the seeds to 5–7% moisture content using forced ventilation at 15°C and 15–20% relative humidity.
- If a drying room and forced ventilation facilities are not available, dry seeds to a moisture content of 5–7% with silica gel or another appropriate desiccant.
- Pack seeds in airtight containers for conservation and distribution.
Monitoring accession identity
Comparisons with previous passport or morphological data
- Verify accession identity using seed traits.
Documentation of information during regeneration
Collect the following information during regeneration:
- Regeneration site
- Name of collaborator
- Plot reference
- Sowing date
- Field layout used
- Field management details (watering, fertilizer, weeding, abnormalities recorded, others)
- Environmental conditions (altitude, precipitation, soil type, others)
- Germination in the field or greenhouse
- Number of plants established
- Days from sowing to flowering
- Breeding system
- Harvest date
- Number of plants harvested
- Quantity of seeds harvested
- Viability of seeds harvested
References and further reading
Advances in Small Millets. Oxford & IBH Publishing Co. PVT Ltd., New Delhi, India. pp. 331–346.
Purseglove JW. 1972. Eleusine coracana (L.) Gaertn. In: Tropical Crops. Monocotyledons. Longman Group Limited, London, UK. pp. 147–156.
Bioversity International, AICRP-Small Millets, IITA, ICRISAT, NBPGR. 2010. Key access and utilization descriptors for finger millet genetic resources. Bioversity International, Rome, Italy; All India Coordinated Research Project on Small Millets, India; International Institute of Tropical Agriculture, Nigeria; International Crops Research Institute for the Semi-Arid Tropics, India; National Bureau of Plant Genetic Resources, India. Available here.
Duke JA. 1978. The quest for tolerant germplasm. ASA Special Symposium 32, Crop tolerance to suboptimal land conditions. American Society of Agronomy, Madison, WI, USA. pp. 1–61.
Duke JA. 1979. Ecosystematic data on economic plants. Quarterly Journal of Crude Drug Research 17:91–110.
Jansen PCM, Ong HC. 1996. Eleusine coracana (L.) Gaertn. In: Grubben GHJ, Partohardjono S, editors. Plant Resources of South-East Asia, No. 10 Cereals. Backhuys Publishers,Leiden, The Netherlands. p. 90.
Prasada Rao KE, de Wet JMJ, Gopal Reddy V, Megnesha MH. 1993. Diversity in small millets collection at ICRISAT. In: Riley KW, Gupta SC, Seetharam A, Moshonga JM, editors.
Acknowledgement
These guidelines have been peer reviewed by Kameswara Rao, International Center for Biosaline Agriculture (ICBA), Dubai, UAE.
Regeneration guidelines for grasspea
|
View regeneration guidelines in full (in PDF) Also available in the following languages: |
The information on this page was extracted from:
Hanson J. and Street K. 2008. Regeneration guidelines: grasspea. In: Dulloo M.E., Thormann I., Jorge M.A. and Hanson J., editors. Crop specific regeneration guidelines [CD-ROM]. CGIAR System-wide Genetic Resource Programme, Rome, Italy. 9 pp.
Before reading the regeneration details for this crop, read the general introduction that gives general guidelines to follow by clicking here.
Introduction
Grasspea (Lathyrus sativus L.) is a member of the Fabaceae family. The genus Lathyrus is large, with more than 150 species, of which only L. sativus is cultivated as a pulse crop. It is grown in the Mediterranean region, Ethiopia, West Asia, the Indian subcontinent and China. The plant is a short, bushy annual herb ranging in height from 20 to 90 cm depending on cultivar. It has pinnately compound leaves, normally with two leaflets, that terminate with tendrils. Flowers, which show a broad range of colours from white through pink to bright blue, are solitary, axillary and borne on peduncles. Pods are oblong, flat and slightly curved, with three to five white to greyish-brown seeds which are usually mottled (Duke 1981). It is a hardy crop, tolerant of extremely dry conditions but still able to tolerate waterlogging and poor soils and is commonly grown on heavy clay vertisols. It does not do well on acid soils. Grasspea is autogamous and considered predominantly self-pollinating. Rahman et al. (1995) report up to 30% cross pollination. In view of this relatively high amount of out-crossing, an isolation distance of at least 20 m (preferably 50 m) between accessions of cultivated grasspea is recommended to maintain genetic integrity during regeneration.
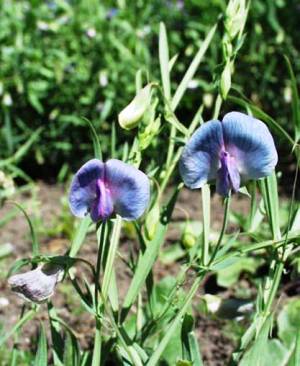 Grasspea flower. (photo: Jean Hanson/ILRI) |
Preparation for regeneration
When to regenerate
- When seed stocks are <150g or 1000 seeds.
- When percentage germination falls to 90% (preferred). The minimum acceptable germination percentage is 75% (FAO/IPGRI 1994).
Other precautions
A population size of at least 80–100 plants should be used for regeneration of landraces. Unimproved landraces and accessions showing a large variation in seed colour and size are likely to be more variable. Larger population sizes should be used in order to maintain genetic variation within the accession. There are no reported transgenes in grasspea.
Choice of environment and planting
Field selection and preparation
- Select frost-free areas with mean temperatures of around 13°C and more than 300 mm annual rainfall.
- Where possible, select loam or clay soils, especially vertisols; avoid acid soils.
- Do not use fields that were planted with grasspea in the previous 3 years to avoid volunteer plants from earlier plantings.
- Plough and disc-harrow to obtain a well prepared and level seed bed prior to planting. Remove any weeds or grass.
Planting season
- Plant in the rainy season to avoid water stress and ensure good seed production. Planting is often done later in the season to allow seed ripening in the dry season.
|
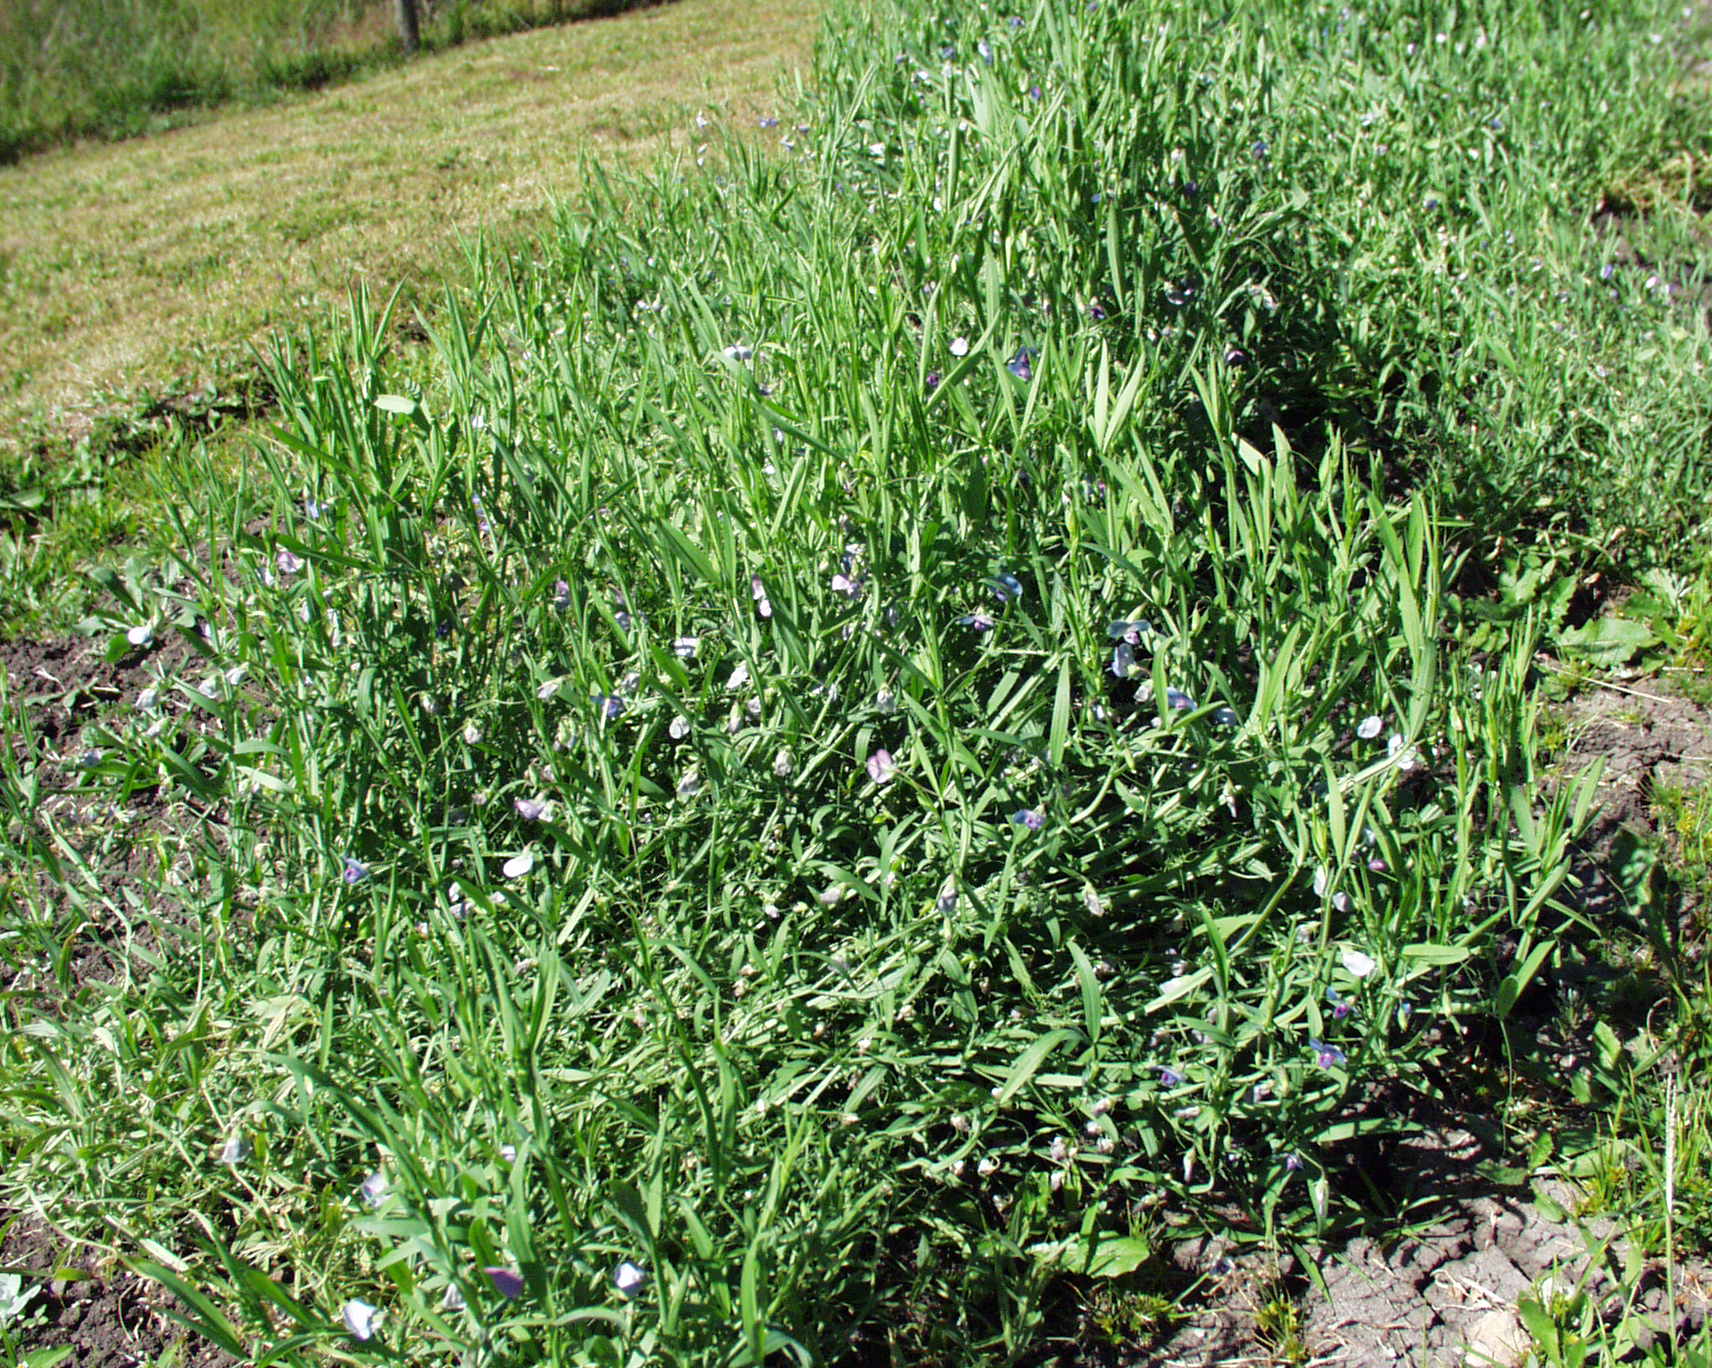
Grasspea regeneration in isolation plots (photo: Jean Hanson/ILRI) |
Method of regeneration
Planting layout, density and distance
- Aim for a final plant number of 80–100 in plots of about 10 m2 (5 × 2 m) (see photo of plots).
- Plant in 10–15 rows of 2 m long, with rows 30–50 cm apart and 10–20 cm spacing between plants, giving a density of 100–150 plants per plot.
- Use bee proof pollination cages to isolate accessions and prevent insect pollination. This is the most effective way to avoid cross-pollination.
- Use an isolation distance of at least 100m between accessions to reduce any out-crossing to very low levels (1%). Plant accessions of other species that do not hybridize with grasspea or of other genera between the grasspea plots to increase the isolation effect.
Sowing method
Direct sowing for landraces
1. Count the number of seeds to be planted per row and place in separate envelopes/bags. Allow two seeds per hole if enough seeds are available because not all of them will germinate. If there are only a few seeds, plant one seed per hole.
2. Label the plot with the accession number and plot number.
3. Lay out the plots at the chosen row spacing.
4. Mark holes for sowing about 2–5 cm deep, 10–20 cm along the row.
5. Check that the accession number is correct and place the corresponding envelope/bag on the end of the row.
6. Open the envelope and place two seeds per hole at 10–20 cm along the row by hand sowing (see photo). Machine planting is not efficient for such small plots.
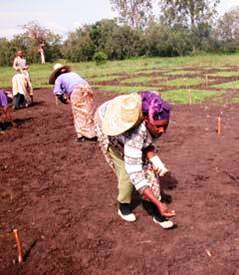 Hand sowing of grasspea. (photo: ILRI)
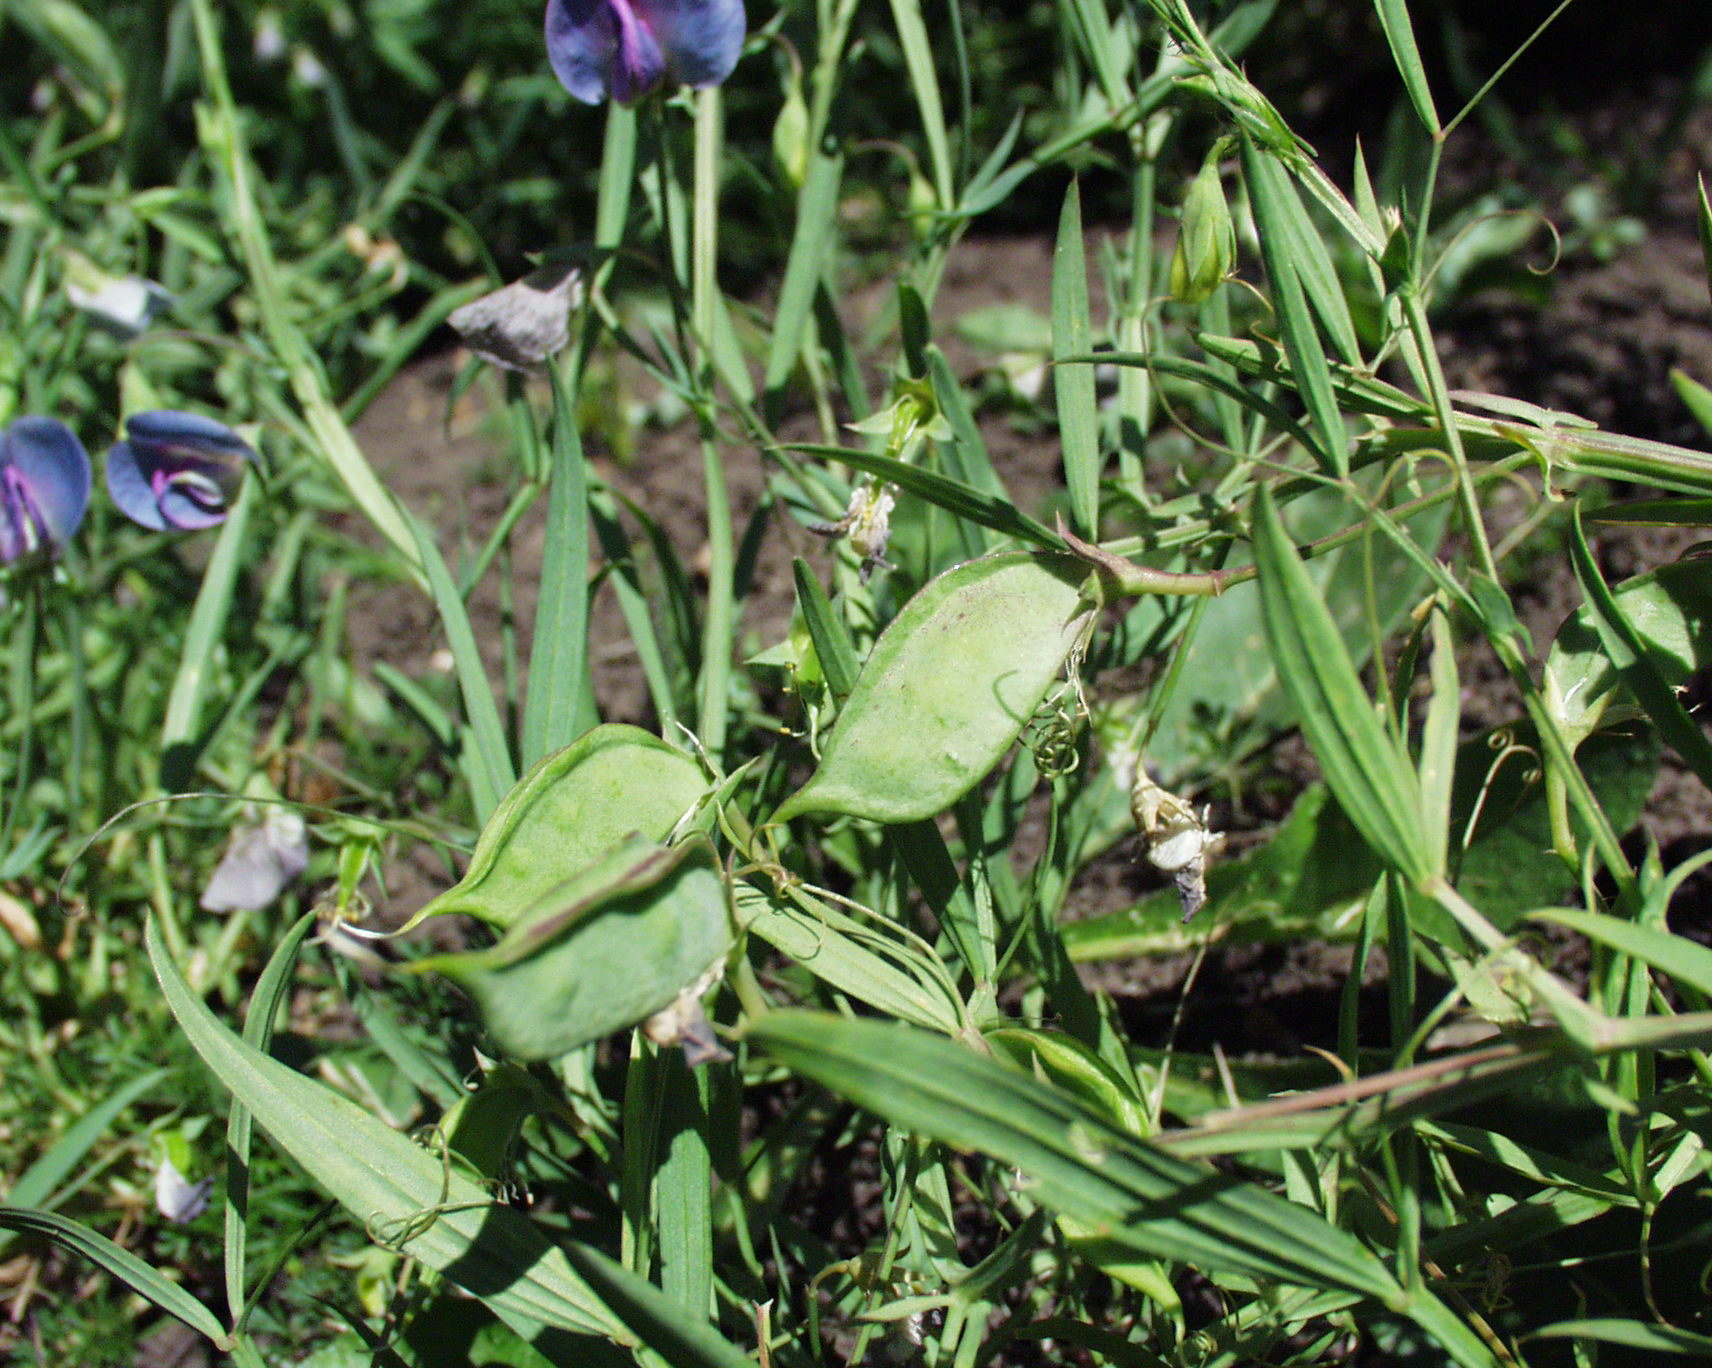
Grasspea pods (photo: Jean Hanson/ILRI) |
7. Cover with soil and lightly compact the row.
Seedling transfer for accessions with small numbers of seeds
1. Germinate seeds in Petri dishes in an incubator at 25°C with 12-hour light (ISTA 2008).
2. As soon as the radicals start to emerge, plant the young seedlings individually in small pots filled with sterilized compost, peat or forest soil.
3. Label the plot with the accession number, planting date and plot number.
4. Keep the pots away from direct sun but with good light intensity or in a greenhouse.
5. Water carefully so the soil remains moist but not wet.
6. Once seedlings reach 10 cm tall, place pots outside for 1 week so seedlings can harden off; keep the soil moist.
7. Peg out the plots at the chosen row spacing and make holes at 10–20 cm along the row.
8. Transplant seedlings to the field, one seedling per hole, taking care not to damage the roots. Water after transplanting.
Thinning
- If direct sown, thin to one plant per hole at 2–6 weeks after establishment when plants are about 10 cm tall to give a plant density of about 100–150 plants per plot and avoid competition that will result in weak plants and low seed yields. When thinning, do not remove only smaller or weaker plants as this will reduce genetic variation. Thinning can be done at the same time as the first weeding.
Fertilization
- Fertilizer application will depend on soil type and fertility. Follow local recommendations.
- It is possible to grow the crop without fertilizer but direct application of phosphorus in the holes (100 kg DAP/ha) before planting is recommended. Applying 50–60 kg N/ha as a top dressing at early flowering stage will ensure good seed quality.
Crop management
Weed management
- Early growth can be slow so weed by hand 4 weeks after establishment when seedlings are about 10–20 cm tall. Ensure field technicians know what young plants look like so they do not mistake them for weeds.
- Eliminate off-types and plants growing off-row.
Irrigation
- Irrigate the field after sowing and then when needed. Do not allow leaves to wilt at any stage and ensure soil is moist at time of flowering.
Common pests and diseases
Major fungal diseases that attack grasspea are grey mould (Botrytis sp.), rust (Uromyces fabae), powdery mildew (Erysiphe polygoni) and downy mildew (Peronospora lathi-palustris) (Duke 1981; Smartt et al. 1994). Grasspea shows resistance to ascochyta blight caused by Mycosphaerella pinodes (Skiba et al. 2004).
Pest and disease control
Grasspea rarely suffers attacks from pests and diseases when grown in dry rainfed conditions.
Spray with fungicide to control mildew during the rainy season or when using irrigation.
Mature grasspea pods at harvest stage. (photo: Yanpei Wu/ILRI) |
Harvesting
- When equal numbers of seeds are required from each accession, hand harvest plants into cotton/cloth bags for drying before threshing or hand pick when the pods start to turn brown and begin to dry but before fully ripe pods start to dehisce and shatter (Kay 1979) (see photo).
- For large plots, where seeds from all plants within an accession will be mixed, cut the stems close to the ground and loosely roll the plants to allow final ripening and air drying before placing in cotton/cloth bags ready for threshing to separate the seeds from the pods.
- When equal numbers of seeds are required from each accession, collect the pods from each plant in labelled cloth or paper bags with an additional label inside each bag. Use paper bags in dry climates only.
- Thresh the pods on a tarpaulin by gently beating them; return the seeds to their labelled bag.
- Ensure that seed mixing does not occur during threshing.
Post-harvest management
1. Clean the seeds of debris by hand picking, hand winnowing or using a seed blower.
2. Hand pick over the seeds in trays to remove any shriveled, discoloured, infected or damaged seeds from each plant. Incinerate the waste to avoid spread of seed-borne diseases.
3. Compare the harvested seed with original seed of that accession for seed size, seed pattern and primary seed colour to check for mistakes/correspondence.
4. Take equal quantities of seed from each plant and mix in one paper bag labeled inside and out. Once you have all the seeds needed, discard any extra.
5. Retain the bags of each accession in temporary storage until seed drying.
6. Take a sample of the seeds for seed health testing. If the fresh seeds are infected with seed-borne diseases and more original seeds are available for a second regeneration, destroy the seeds by incineration. If no original seeds are available, schedule the seeds for a further regeneration in control ed environmental conditions using agrochemicals to obtain clean seeds.
7. If the seeds are free from pests and diseases, dry them in low relative humidity at 15°C until they reach 3–7% moisture content.
8. Remove the seeds from the drying room, weigh and pack directly into storage containers. Options for medium-term storage include plastic containers or cans with sealed lids for storage in environments with humidity control or laminated aluminium foil packets for storage in environments without humidity control. Use of laminated aluminium foil packets is more suitable for long-term storage. Seal the containers or packets immediately.
9. Sample and test the viability of the seeds and record the results fol owing standard germination methods (ISTA 2008). If viability is high, proceed to storage. If viability is low, reschedule the accession for a further regeneration from the original seeds.
10. Store grasspea seeds in the genebank at 5–10°C in medium-term storage or at -18°C in long-term storage.
Regeneration of wild species of grass pea
- Many of the wild species have hard seed and require scarification before planting to allow imbibition. Gently rub hard seeds between two pieces of sand paper until the seed coat is scarified or, using tweezers with well defined square edges, apply gentle but firm pressure to the seed coat with the arms of the tweezers open to about 2 mm so that a small section of the seed coat will chip off. A scalpel can also be used to chip the seed coat.
- Either direct sowing or seedling transfer can be used (see above) depending on the number of seeds available.
- Most Lathyrus species have plants of a similar size to the cultivated L. sativus and the same planting density and management can be used to regenerate accessions of wild species.
- Some of the wild species are outbreeding and will require a greater isolation distance than the cultivated grasspea (Brahim et al. 2001). Isolation distances of 100 m or pollination cages are recommended for outcrossing wild species.
|
Species |
Growth type |
Breeding system |
|
L. annuus |
Annual |
Inbreeding |
|
From: Brahim et al. (2001) |
||
- Many of the wild species have dehiscent pods, so harvesting time should be earlier than for cultivated species and carefully timed for when the pods start to turn brown and begin to dry but before they dehisce and shatter.
Diversity of grasspea flower colour. (photo: Yanpei Wu/ILRI) |
Monitoring accession identity
Comparisons with previous passport or morphological data
Grasspea accessions are distinguished on the basis of flower, pod and seed traits (Jackson and Yunus 1984). Compare following traits in characterization data:
- Flower colour (see photo)
- Pod markings
- Seed coat pattern
- Primary seed colour
- Stem pigmentation
Documentation during regeneration
The following information should be collected during regeneration:
- Regeneration site name and map/GPS reference
- Name of data collector
- Field/plot/nursery/greenhouse reference
- Accession number; population identification
- Source of seed
- Generation or previous multiplication or regeneration (if generation is not known)
- Preparation of planting materials (pre-treatments)
- Sowing date
- Field layout used
- Field management details (watering, fertilizer, weeding, pest and disease control,
- stresses recorded, others)
- Environmental conditions (altitude, precipitation, soil type, others)
- Emergence in the field or greenhouse (number of plants germinated)
- Number of plants established and harvested
- Isolation method used
- Harvest date and method
- Quantity of seeds harvested/accession
- Comparisons with reference materials (record any identification numbers or references of any samples or herbarium specimens taken from this regeneration plot)
- Post-harvest procedures
References and further reading
Asmussen CB. 1993. Pollination biology of the Sea Pea, Lathyrus japonicus: floral characters and activity and flight patterns of bumblebees. Flora 188:227-237.
Bioversity International, ICARDA. 2009. Key access and utilization descriptors for Lathyrus genetic resources. Bioversity International, Rome, Italy; International Center for Agricultural Research in the Dry Areas, Syria. Available here.
Brahim NB, Combes D, Marrakchi M. 2001. Autogamy and allogamy in genus Lathyrus. Lathyrus Lathyrism Newsletter 2:21–26.
Chekalin NM. 1972. [The evaluation of the degree of the selectivity of fertilization in peavine]. Sel'Skokhozyaistvennaya Biologiya 7 (1):103-107.
Chekalin NM. 1973. Selectivity of fertilization in the grass pea (Lathyrus sativus L.). Soviet Genetics 9 (12):1501-1507.
Chekalin NM. 1975. Character of displaying selective fertilization in self fertilized lines and hybrids of Lathyrus sativus. Sel Semenovod Kiev 30:40-44.
Chekalin NM, Samorodov VN. 1975. Rate of growth of pollen tubes in mutant self pollinating lines of Lathyrus sativus. Sel Semenovod Kiev 29:94-97.
Chekalin NM, Zelenskaia LA. 1973. Inheritance of male sterility in Lathyrus sativus with crossing of sterile plants with fertile pollenizer lines. Sel Semenovod Kiev 23:51-54.
Chowdhury MA, Slinkard AE. 1997. Natural outcrossing in grasspea. Journal of Heredity 88 (2):154-156.
Duke JA. 1981. Handbook of Legumes of World Economic Importance. Plenum Press, New York, USA. pp. 199–265.
FAO/IPGRI. 1994. Genebank Standards. FAO and IPGRI, Rome, Italy. Date accessed: 16 August 2008.
Godt MJW. 1991. Genetic structure, mating patterns, and gene flow in Lathyrus latifolius L. [PhD thesis]: University of Georgia, 145 pp.
Godt MJW, Hamrick JL. 1991. Estimates of outcrossing rates in Lathyrus latifolius populations. Genome 34 (6):988-992.
Godt MJW, Hamrick JL. 1993. Patterns and levels of pollen mediated gene flow in Lathyrus latifolius. Evolution 47 (1):98-110.
Gorodnii NG, Fesenko AF. 1975. Opylenie chiny. [Pollination of Lathyrus pratensis]. 95(3):24-25.
Gutierrez JF, Vaquero F, Vences FJ. 1994. Allopolyploid vs. autopolyploid origins in the genus Lathyrus (Leguminosae). Heredity 73 (1):29-40.
ISTA. 2008. International Rules for Seed Testing. International Seed Testing Association. ISTA Secretariat, Switzerland.
Jackson MT, Yunus AG. 1984. Variation in the grasspea (Lathyrus sativus L.) and wild species. Euphytica 33:549–559.
Kay D. 1979. Food legumes. Tropical Development and Research Institute (TPI). TPI Crop and Product Digest No. 3. TPI London, UK. pp. 26–47.
Piatitskaia LI. 1972. Biology of flowering and viability of pollen of Lathyrus vernus. In Rasteniia Prirodnoi Flory Sibiri Dlia Zelenogo Stroitel'Stva :166-169.
Rahman MM, Kumar J, Rahman MA, Afzal MA. 1995. Natural outcrossing in Lathyrus sativus L. Indian Journal of Genetics 55:204–207.
Skiba B, Ford R, Pang ECK. 2004. Construction of a linkage map based on a Lathyrus sativus backcross population and preliminary investigation of QTLs associated with resistance to ascochyta blight. Theoretical and Applied Genetics 109:1726–1735.
Smartt J, Kaul A, Wolde Amlak Araya, Rahman MM, Kearney J. 1994. Grasspea (Lathyrus sativus L.) as a potentially safe food legume crop. In: Muehlbauer FJ, Kaiser WJ, editors. Expanding the Production and Use of Cool Season Food Legumes. Kluwer Academic Publishers, Dordrecht, Netherlands. pp. 144–155.
Valero M, Youssef A, Vernet P. 1986. Is there polymorphism in the breeding system of Lathyrus latifolius? Kaul, A. K. and Combes, D. (Eds). Lathyrus and Lathyrism. Proceedings of the International Symposium 9-13 September France, New York: Third World Medical Research Foundation, pp. 105-117.
Yunus AG, Jackson MT. 1991. The gene pools of the grasspea (Lathyrus sativus L.). Plant Breeding 106 (4):319-328.
Acknowledgements
These guidelines have been peer reviewed by Prem Mathur, Bioversity International, India; F.J. Muehlbauer, United States Department of Agriculture – Agricultural Research Service (USDA-ARS), USA; and William Erskine, Centre for Legumes in Mediterranean Agriculture (CLIMA), University of Western Australia.
More Articles...
- Regeneration guidelines for lentil
- Regeneration guidelines for major aroids
- Regeneration guidelines for pearl millet
- Regeneration guidelines for pigeonpea
- Regeneration guidelines for wild potato
- Regeneration guidelines for sorghum
- Regeneration guidelines for sweet potato
- Regeneration guidelines for yam
- Regeneration guidelines for small-grained cereals
Subcategories
-
main
- Article Count:
- 17


